之前写过一篇关于在Linux环境下配置虚拟主机的文章;
现在又有一种场景;在本地同时写多个项目;可本地的wamp环境下默认只有一个www目录;这样经常修改目录很痛苦;
那么幸福就这么猝不及防的来了;下面就介绍下如何在本地配置wamp多目录;
示例环境:
wampserver版本:2.5
wamp目录:E:/tongbu/wamp/
本地域名:
localhost
test.com
本地目录:
E:/tongbu/wamp/www/
E:/tongbu/wamp/test/
想要达到的效果是:
访问localhost 指向的是E:/tongbu/wamp/www/
访问test.com指向的是E:/tongbu/wamp/test/
1:修改E:/tongbu/wamp/bin/apache/Apache2.2.21/conf/httpd.conf文件
查找看是否有如下代码
大约在240行
<Directory />
    AllowOverride none
    Require all denied
</Directory>

如有则替换为如下代码;如无则跳过此步骤;
<Directory />
    Options FollowSymLinks
    AllowOverride All
    Order deny,allow
    Deny from all
</Directory>
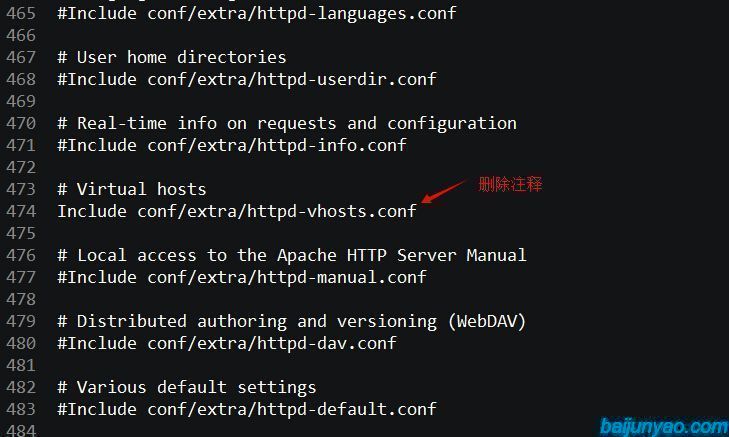
查找Include conf/extra/httpd-vhosts.conf 删除注释#号 大约在474行
搜索 /wamp/www/ 将
<Directory "E:/tongbu/wamp/www/">
    #
    # Possible values for the Options directive are "None", "All",
    # or any combination of:
    #   Indexes Includes FollowSymLinks SymLinksifOwnerMatch ExecCGI MultiViews
    #
    # Note that "MultiViews" must be named *explicitly* --- "Options All"
    # doesn't give it to you.
    #
    # The Options directive is both complicated and important.  Please see
    # http://httpd.apache.org/docs/2.4/mod/core.html#options
    # for more information.
    #
    Options Indexes FollowSymLinks

    #
    # AllowOverride controls what directives may be placed in .htaccess files.
    # It can be "All", "None", or any combination of the keywords:
    #   AllowOverride FileInfo AuthConfig Limit
    #
    AllowOverride all

    #
    # Controls who can get stuff from this server.
    #

    #   onlineoffline tag - don't remove
    Require local
</Directory>
替换为如下内容
<Directory "E:/tongbu/wamp/www/">
    Options Indexes FollowSymLinks
    AllowOverride all
    Order Allow,Deny
    Allow from all
    Require local
</Directory>
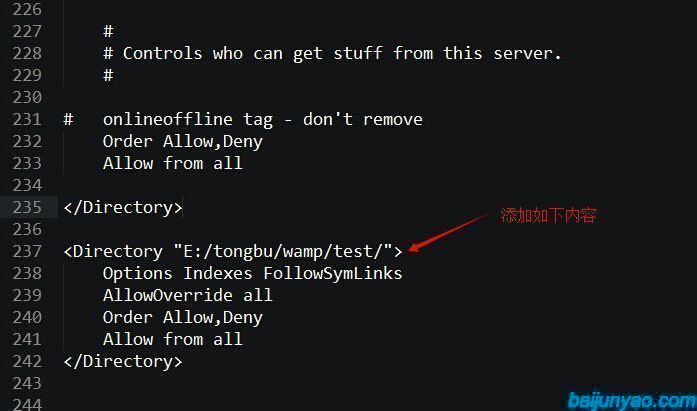
然后在最后添加如下内容
<Directory "E:/tongbu/wamp/test/">
    Options Indexes FollowSymLinks
    AllowOverride all
    Order Allow,Deny
    Allow from all
</Directory>
2:修改E:/tongbu/wamp/bin/apache/Apache2.2.21/conf/extra/httpd-vhosts.conf文件
<VirtualHost *:80>
    ServerAdmin webmaster@dummy-host.example.com
    DocumentRoot "c:/Apache24/docs/dummy-host.example.com"
    ServerName dummy-host.example.com
    ServerAlias www.dummy-host.example.com
    ErrorLog "logs/dummy-host.example.com-error.log"
    CustomLog "logs/dummy-host.example.com-access.log" common
</VirtualHost>

<VirtualHost *:80>
    ServerAdmin webmaster@dummy-host2.example.com
    DocumentRoot "c:/Apache24/docs/dummy-host2.example.com"
    ServerName dummy-host2.example.com
    ErrorLog "logs/dummy-host2.example.com-error.log"
    CustomLog "logs/dummy-host2.example.com-access.log" common
</VirtualHost>
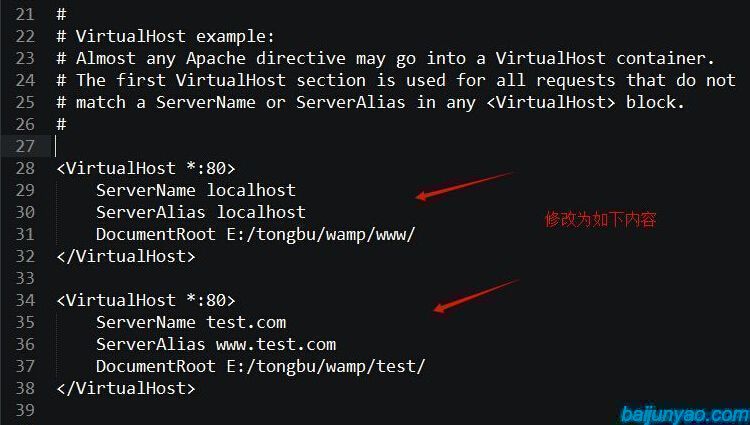
将上面这段修改成如下这段:
<VirtualHost *:80>
    ServerName localhost
    ServerAlias localhost
    DocumentRoot E:/tongbu/wamp/www/
</VirtualHost>

<VirtualHost *:80>
    ServerName test.com
    ServerAlias www.test.com
    DocumentRoot E:/tongbu/wamp/test/
</VirtualHost>
3:修改C:Windows/System32/drivers/etc/hosts文件
添加内容如下:
127.0.0.1 localhost
127.0.0.1 test.com

大功告成;在wamp目录E:/tongbu/wamp/下创建test文件夹;在本地访问localhost 和 test.com即可
绿色字体部分根据情况修改为自己本地目录即可;
最后的最后 一定要记得重启wamp服务;
如需在Linux环境下Apache配置多个虚拟主机挂载多站点同时运行 可参考:Linux环境下Apache配置多个虚拟主机挂载多站点同时运行
//***************************************华丽的分割线************************************
2016.3.20补充:wampserver已经升级到3.0版本;
新的文章 wampserver配置虚拟主机 有下载链接;
推荐使用3.0版;


发表评论 取消回复